Beginner's Toolbox
|
You don't have to break the bank - but it's fun, to try! There are wonderful tools out there to help you with every clay task you can think of… from toothpicks to the expensive specialty cutters sold in kitchen supply stores. All you really need to get started making some wonderful things are simple tools, your brain and your hands.
1. Safety first. A good quality oven thermometer is the most important essential.
|
|
Now, having said all that, I have to admit that I'm
somewhat a tool fanatic... I know it really isn't necessary to have every new tool that comes
along, but I still love having them. I make many of my own tools, and that is part of the whole "clay-fun" thing.
Sometimes a tool will inspire a process, or a project... a texture plate may conjure up a pendant, a stamp may
prompt you to make a switchplate. Some of my tools, I rarely use, but I do get ideas just rummaging through the
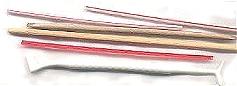
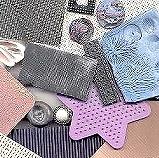
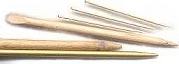
various bins and boxes of them. You don't have to spend a mint on tools to get started. You can improvise & create tools from found objects, household items, and even clay. At right are some cool things that I use a lot, coffee stirrers of various shapes, cuticle sticks, a disposable dental tool of some kind, and a whole lot of textures... window screen, sanding screen, fabric, buttons, seashells, toys... You'll need cutters... you can make do with a paring knife and a utility blade. For really precise cane slicing, you can't beat tissue blades, and X-acto® knives are very handy for other precision cutting. I love the stainless tissue blades by Kemper and Sculpey, and the NuBlade by Donna Kato. |
|
|
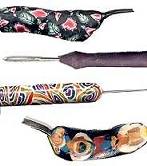
There are a couple of HUGE "Natasha beads" and caned
cylinders, in my toolbox... I embedded linoleum V-cutter tips in the Natasha beads and formed to my hand before I baked
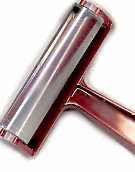
them. You can do the same with darning needles, fabric sculpting needles, natural fiber paint brushes, drill bits and other rotary bits. Some sort of rolling pin or brayer is almost indispensable, even if you have a pasta machine. You can sand a wooden dowel and make a reasonable rolling pin, but my favorite is a big Plexiglas tube. For small things, I use a Bic stick pen or a small diameter Plexiglas tube. Toothpicks, skewers and thinner knitting needles are great for poking holes in beads, putting details into sculpted items and making props for heavy extensions that might sag in the oven. To save clay on large items, you might want to crumple aluminum foil to make a form to apply sheets of clay to.
|
|
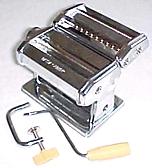
After our brains and hands, the pasta machine is
our most important tool… we use it for conditioning & mixing colors. It makes smooth, even sheets for jewelry
techniques, coverings & figure clothing. The extrusion-type pasta machines aren't any help to us. What you're
looking for is a roller-type machine, like this one. The best brand for claywork is one of the ATLAS MARCATO brands,
though many people are happy with the Imperia brand, as well. The other brands are probably fine for making pasta,
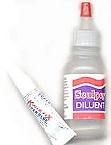
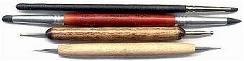
but clayers are likely to get flaking chrome & stripped gears only a couple of weeks after they're purchased. Keep a few tubes of cyanoacrylate type glue around, along with regular white glue. I've read that the bond strength of the cyanoacrylate type lessens after opening, so I consider a tube disposable... if I haven't used it in a couple of days, I throw it out. This may be overdoing it just a tad, but it's cheap enough that I don't want to take a chance. Sobo and other white glues are sometimes used to coat items prior to covering with clay - papier mache' for instance. I also like E6000 for things like applying pin-backs, but lately, I'm using TLS to put pin-backs on things, if I've got time. Sculpey Diluent is indispensable. In addition to softening clay that's old, it can be used to soften up a cured surface and facilitate a good bond between pieces, even if one of the pieces is baked. Since I started applying it between two parts before baking, I've had much less incidence of parts falling off. You can also add mica powders to it and "paint" it onto a piece before baking. The same is true of Translucent Liquid Sculpey, except that you can also use this product to fuse two previously baked parts together. With the diluent, at least one piece has to be raw. And the creative opportunities presented by TLS would take a couple of books, all by itself. There are lots of other things I find myself reaching for, repeatedly... ball stylus' in different sizes, clay shaper tools, cutters of all kinds. I especially like the little Kemper spring cutters. I use the clay gun less since I switched to using primarily Fimo, but it's a great tool with really soft clay. Sooo.... did I forget anything? If I missed your favorite tool, email me... I'm planning another set of pages that show how some of these tools are used, up close and personal. :-) |
|

Main