Main
![]()
![]() Great Starts
Great Starts ![]()
![]() Links
Links
![]()
![]() Gallery
Gallery ![]()
Pinch pots or "bubble bottles"
|
You probably remember some variation of
pinch pots from grade school or Scouts. This method has been around for about as long as people have, and
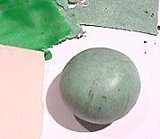
of course, any object that can be made with the earth clays, we "polyheads" snitch for our own. Start with a blob of clay, any color or scrap clay. This particular clay is a mix made from tearing pieces of Granitex jade, Fimo Soft jade, Premo green and laying them at random on Premo translucent. After I'd torn and restacked the sheets as they came out of the pasta machine a few times, I then knocked some very fine crumbs of very old black Fimo onto the sheet and ran it through a few more times, varying the direction, to get this mix. |
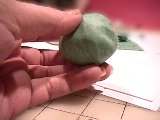    |
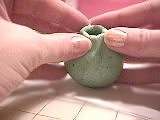
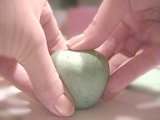
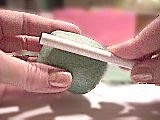
Work the clay into a smooth ball, then flatten it slightly and begin to indent it with your thumbs, pulling the outside edges upward. Beginning at the bottom of this bowl, begin to feel for uniform thickness as you're turning it in your fingers, compressing the thicker areas and pulling the excess created up into the top part of the bowl. As this part of the forming continues, you will be trying to get the walls of the vessel equally thick all the way up. I had to cut my thumbnails for this project. *g* | 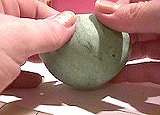 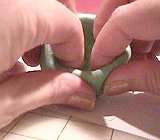 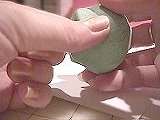 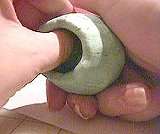 |
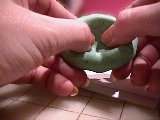
When the vessel is about half as tall as the eventual size, it's time to start completing the second half of the sphere. Turning the clay constantly in your hands, gradually ease the diameter smaller, taking care to keep the thickness even. Squeeze your thumbs together from the outside, then reach inside with a finger to pull the thickened area upward. Turn, repeat. Keep turning, keep it moving, always checking for consistent walls and smoothness. |
|
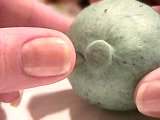
Right about here, it's kind of like you
"downshift," and though you're continuing the same motions, you're doing them much "smaller." Hope that
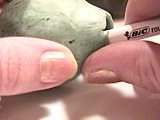
makes sense. *g* Little bits at a time, to keep your consistent walls and avoid huge bumps. When the opening is so small that you can't
hook a finger inside to pull that thicker clay upward, you can use the handle of a paintbrush or a stick pen as a
"brayer" to roll the clay against your thumb from the inside. Squeeze together, pull up.... |
|
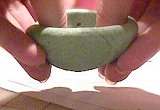
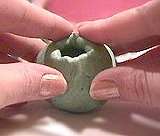
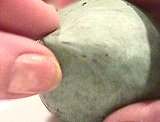
Coax that sphere smaller and smaller. You might have to really think about what you're doing the first few tries, but believe me, it will become automatic. When the opening is very small, make sure that you are trapping as much air as possible... if you notice that one spot is collapsed, open it back up and force that wall outward. Pull the opening into a point, then smoosh (yes that's a technical term *g*) it down with your thumb while turning the sphere. Smooth the clay down to blend and lose the edges. |
    |
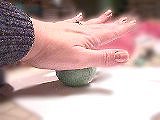   |
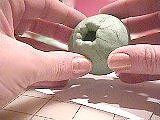
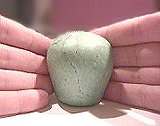
Roll the sphere gently in your hands to
shape it, then roll it on a flat surface to smooth out fingerprints and bumps. Let it sit for a while to get cool and firm up. I'm going to mix up some more while this one cools. When it's cool, you can begin to shape it in whatever form you can think up. I really like old jars and amphorć, and use those kind of shapes a lot. I'm turning, pressing the base into the table and narrowing the base at the same time. |
 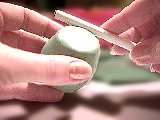  |
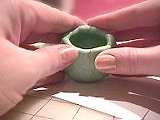
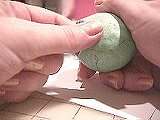
More turning, keep shaping.... The idea is to make small changes at any one time, and if you're looking for a symmetrical piece, to do whatever you do to one side to the other, to keep the shape balanced. I like to use a pen to "brayer" the curves and outside of the walls... removes all kinds of 'dings' that your piece might have gotten along the way. |
On to second page of instructions and ideas.....
Main