Main![]()
![]() Great
Starts
Great
Starts
![]()
![]() Links
Links![]()
![]() Gallery
Gallery
Pens, Page 2 ---->![]() Pens, Page 3 ----->
Pens, Page 3 ----->
Everyone loves pens!
These are still some of my favorite projects to do... almost any new technique I learn or any new cane I
make gets tried on a few pens.
There's just something cool about taking such a utilitarian item and making it beautiful while not interfering with it's
usefulness. And if I messed something up in the technique or the cane ain't the greatest, it's still a usable object.
| Learning to cover pens with polymer clay isn't difficult, but there are a lot of tricks to use along the way to make it easier. I'm using plain old Bic stic pens for these demonstrations, but there are several brands that work well with the clay. Use a needlenose pliers and an unscrewing motion to remove the gold colored plastic tip from the pen. The ink refill is attached to this gold part. Be careful not to let the pliers slip and pull out the tiny metal point. | 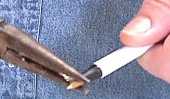
|
|
Some simple tools will help you make this an
easier project. I'm going to show you the methods that I use, but everyone develops something that works well
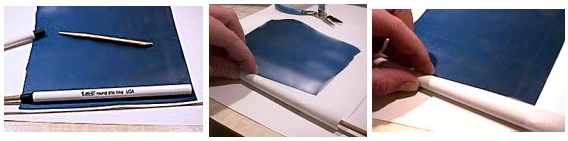
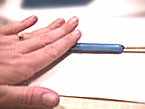
for them, so these are just hints to get you started, not "rules." I cut the larger size shish kebab skewers to 4 or
5" in length, and use them as helpers for handling the pen at every stage. Cuts down on fingerprints, plus it gives
me a handy "dipping" and drying tool. Put the pointed end of the skewer into the pen barrel and if you've cut the
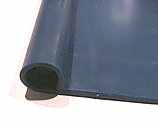
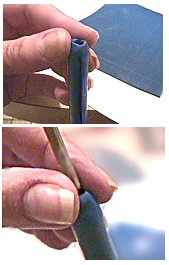
other end on a slant, it will later dig into a block of styrofoam rather easily. Cut one edge of your sheet of clay even and lay it along the edge of a piece of plain paper. This is a #4 sheet of clay, subtly shaded. Lay your pen along the front edge and use the paper to pull the clay up over the pen... this helps to keep the clay from stretching out of shape. Roll the paper/clay over the pen and smooth it to the pen from end to end. |
|
|
|
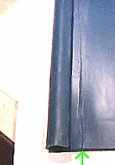
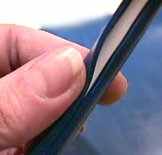
| Pull the paper away and continue to roll the clay forward. When it's rocked into the sheet of clay, it will leave a cutting guide mark. Rock it back open a bit and see that the edge on the top of the pen has left a line on the clay that's lying flat. Cut just inside that line, & roll the pen forward again to pick up the rest of this strip that you've cut. Make sure that these two edges just touch... if the clay overlaps, you'll have trouble getting an even cover all the way around. |
|
Use another pen as a small brayer, rolling it diagonally across the seam, until it seems to disappear. Roll in one
direction, and then the other. Remove the skewer temporarily if you need to, to smooth the opening down to a taper. Cut off excess clay, here. Replace the skewer, then use it to twirl the other end of the pen between your fingertips to remove bumps and lumps. Final smoothing, next. |
|
|
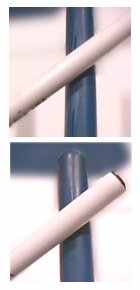
Roll the pen on a smooth surface to even out any irregular surfaces. Holding the pen at a shallow angle to the edge of the table or countertop, roll the tapered end to eliminate any bumps or lumps. Trim off that extra clay at the end where it builds up at the tip, and shape again. The pen may require several cycles through this rolling and shaping before it looks right to you. | 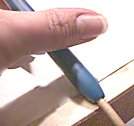
|
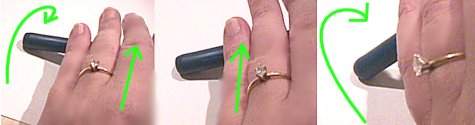
| This is kind of a cool way to round the end. Holding the skewer in my right hand, I'm rolling the pen forward with my left, putting very little downward pressure on the pen. I'm gradually lifting the skewer, and it forms a nice, perfectly rounded end. Well, after a few practices, I should say. *g* You'll probably need to roll it on the table, now, to remove new fingerprints. Repeat the stages as you need to. |
|
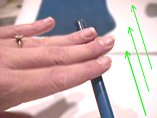
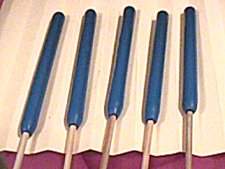
Use a light whisking motion to remove fingerprints. I've accordion pleated a manila file folder, which is what I bake on. These pens will wait in the rack for decorating before baking. |
|
|
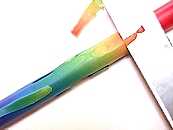
A really easy trick if you're using a sheet of shaded blend is to shave off tiny slices from the surface of the pen, turn them inside out, and roll them onto the pen. This is especially dramatic in blends that haven't been folded and sent through the pasta machine as many times as this one has. | 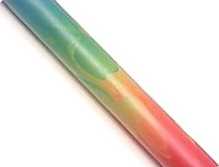
|
Pens, Page 2 ---->![]() Pens, Page 3 ----->
Pens, Page 3 ----->
Main